Character Recorder Tutorial
From Moviesandbox
Contents |
[edit] Introduction
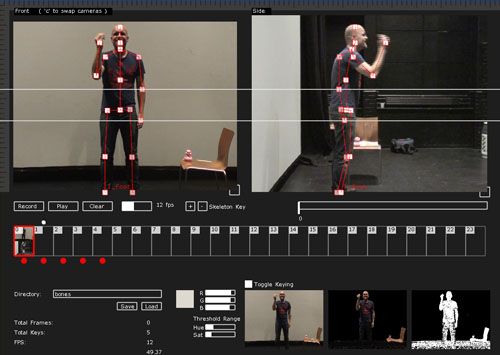
The Character Recorder tool can be used to create skeletal models on top of recorded video. It is designed to work with two camera views ( a front pose and side/profile pose). With these two images, 3d information can be saved in sequence and potentially used to animate 3d models. The tool also includes a feature to chroma key the image (green screening).
[edit] Camera Views
[edit] Swapping Cameras
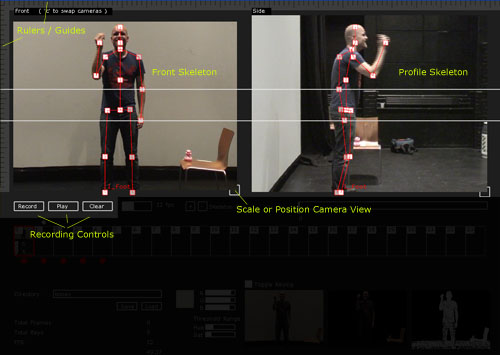
The tool, by default, sets up the left view as the front camera and the right as the side camera. If your cameras are connected differently, the images can be swapped (press 'c' key ).
[edit] Scaling and Positioning
The camera views should align so that the figures in each image are at the same height and scale. If the physical cameras have different lenses or are at varying distances, the images in the software can be scaled and repositioned to align them correctly.
Scale: left-mouse click and drag the box in the lower right corner
Position: right-mouse click and drag the box in the lower right corner
[edit] Rulers and Guides
To create guides, click and drag from the rulers on the top or left of the screen. To remove a ruler, drag back onto the ruler area.
[edit] Recording and Playback
[edit] Record
The 'Record' button underneath the left camera image, toggles recording on and off. Note that once recoding is finished, thumbnails are created for each frame and will temporarily slow the application.
[edit] Play / Pause
The 'Play' button toggles playback on and off.
[edit] Framerate
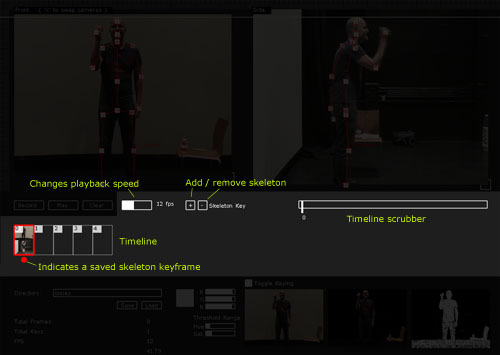
The fps slider next to the recording controls, can be used to change the playback rate. Default is 12fps.
[edit] Timeline
After recording, the timeline frames appear beneath the camera images. Each frame is labeled with its number in sequence.
[edit] Scrubbing through the timeline
The slider above the timeline (under the right camera) can be used to move through the timeline. The current frame is highlighted with a red border and is displayed onscreen.
[edit] Toggle frames on/off
Frames of video can be turned 'off' or 'on' by right-mouse clicking on the thumbnail in the timeline. 'off' frames are skipped in playback.
[edit] Setting in/out points
Start and end points for the recording can be set using keypresses 'i' for the in (start) point and 'o' for the out (end) point. All frames before and after these points will be turned off.
[edit] Editing Skeletons
For each frame of recorded video, a skeleton can be edited and saved.
[edit] Editing joints
The skeleton is overlayed on top of the corresponding camera view. Each joint on the skeleton can be moved to match the pose in the video. Click and drag a joint to reposition. The joints in both views are moved accordingly.
[edit] Saving Skeletons
To save edits, use the button '+' labeled 'Skeleton Keys"'. This will attach the current skeletons to the current frame of video. A red dot below the timeline indicates that the skeleton has been recorded. The '-' key removes the skeleton from the frame.
[edit] Chroma Keying
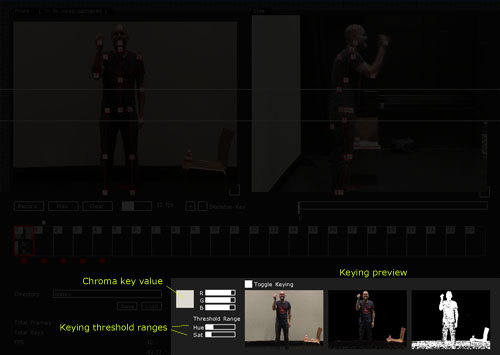
Video frames can be keyed by setting and rgb value and adjusting the threshold ranges for hue and saturation keying. The RGB sliders adjust the keying color and the hue and sat sliders adjust a range value for each ( a lower range is stricter meaning that the keyed pixels must be closer to the chosen color).
The keying panel appears when turned on with the 'Toggle Keying' button.
[edit] Saving and Loading
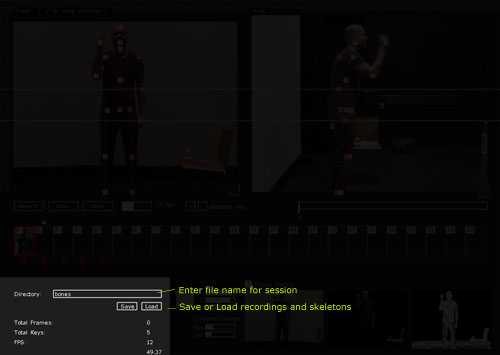
Each session can be saved and later loaded and re-played or edited. Enter a name in the directory box and press 'save' to save the session. The frames of video and skeleton information will be saved in the data --> recordings folder.
